Valve pressure drop
The previous tutorials focused on the basic features of XLThermo. Now we can start making something useful, while still keeping things simple. In this tutorial, you will learn to make a small model using XLThermo: a simple valve pressure drop calculation. You can find the resulting spreadsheet here: ValvePressureDrop.xlsx.

Before you start
Make sure you you understand the basic features of XLThermo, and how to use the spreadsheet functions to calculate fluid properties and converting between units systems. If you haven't done so, we recommend you to complete the following tutorials first: Basic usage and Working with different units.
Basic concepts
The throttling of a fluid through a valve is a common operation in many industrial processes. Thermodynamically, this is considered to be an isenthalpic process, where the enthalpy of the fluid remains constant (
Valves are used to control a process by restricting the flow of a fluid, causing a pressure drop across the valve. The pressure drop as a function of flow, depends on several things, so we won't go in to the details here. Instead, we will assume that the process is controlled simply by specifying the pressure drop across the valve.
That means that if we know the inlet conditions of the fluid, and the pressure drop across the valve, we know the outlet pressure and enthalpy (since there's no enthalpy change across the valve). To compute the outlet conditions, we can use the XLT.REF.FLASH.PH function, which calculates the properties of a fluid at a fixed pressure and enthalpy.
For a more detailed explanation of isenthalpic processes, see here.
Model set-up
First, we will set up a few things to make things simpler for us, namely to specify the fluid and the units system in a central location.
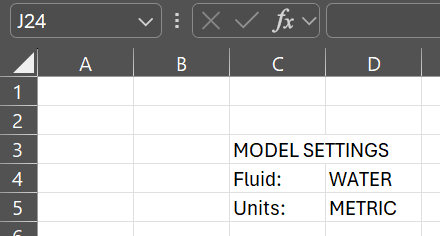
In cell C3, write "MODEL SETTINGS".
In cell C4, write "Fluid:".
In cell C5, write "Units:".
In cell D4, write "WATER".
In cell D5, write "METRIC".
Give cell D4 the name "Fluid".
Give cell D5 the name "Units".
You should now have something that looks like this:

To make things even easier in the following, you can assign a name to cell D4 and D5, that holds the fluid name and the units system, respectively. This can be done by selecting the cell, and then simply writhe the name you want in the address box:

Adding the valve specification
Next, we need to add the valve specification to the spreadsheet:
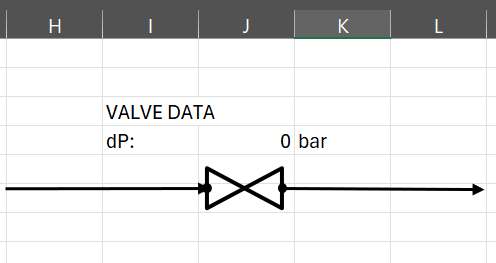
In cell I3, write "VALVE DATA".
In cell I4, write "dP:".
In cell K4, write the following formula:
=XLT.UNITS("P";Units)This will write the pressure units for the currently selected units system. Since we are using the metric system, the unit will be
bar.If you wish, you can add a small schematic of the model.
You should now have something that looks like this:

Inlet stream properties
Now we get to some of the more interesting stuff, where we are going to make actual calculations. First, we need to specify the state of the inlet stream. This is done by specifying any two thermodynamic properties, but to keep things simple, let's go ahead with a fixed pressure and vapor fraction:
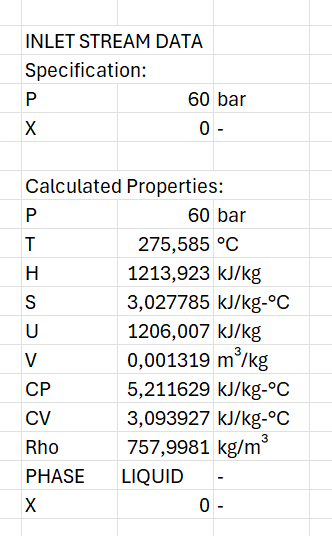
In cell G9, write "INLET STREAM DATA".
In cell G10, write "Specification".
In cell G11, write "P" or "PRESSURE".
In cell G12, write "X".
In cell I11, write the following formula:
=XLT.UNITS(G11:G12;Units)This will write the units for the two input variables using the currently selected units system.
In cell H11, write "60".
In cell H12, write "0.0".
This will specify the state to be saturated liquid at 60 bar.
This sets the state of the inlet stream, but before we go ahead, we need to compute the properties of the inlet stream:
In cell G14, write "Calculated Properties:".
In cell G15 and below, you can write the names of the properties you want to calculate. This can be anything you want, but should as a minimum include the enthalpy, H. For this example, I have chosen P, T, H, S, U, V, CP, CV, RHO, PHASE, and X.
In cell H15, write the following formula:
=XLT.REF.FLASH.PX(Fluid;$H$11;$H$12;G15:G25;Units)The references to H11 and H12 is the inlet stream specification, whereas the reference to the array G15:G25 is the list of properties to compute. The simplest approach is simply to select your list of properties while editing in the formula bar.
Finally, in cell I15, write the following formula:
=XLT.UNITS(G15:G25;Units)As before, this will write the units for each of the calculated properties.
You should now have something that looks like this:

Outlet stream properties
Finally, let's add the outlet stream properties to the model.
First, copy the range G9:I25 to the range K9:M25
Change cell K9 to "OUTLET STREAM DATA".
Change cell K12 to "H".
Set the value of cell J4 to 55, to specify a pressure drop of 55 bar over the valve.
In cell L11, write the following formula:
=H11-J4The calculates the outlet pressure from the inlet pressure and the specified pressure drop over the valve.
In cell L12, write the following formula:
=H17This will set the enthalpy of the outlet stream to be equal to the inlet stream.
Lastly, change cell L15 to the following formula:
=XLT.REF.FLASH.PH(Fluid;$L$11;$L$12;K15:K25;Units)This will compute the properties of the outlet stream, specified at fixed pressure and enthalpy.
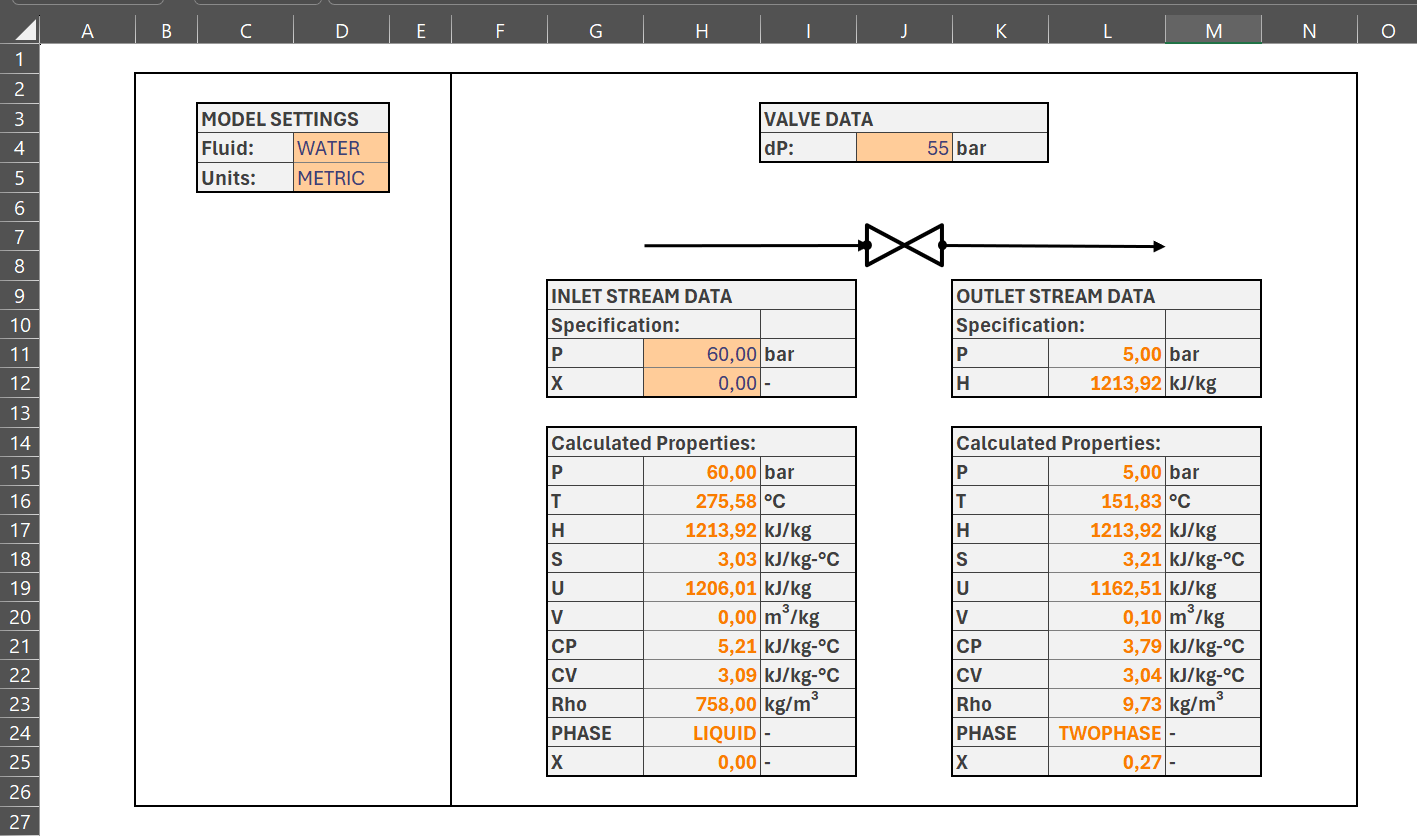
This was the last step! With a bit of formatting, the model should look something like this:

Using the model
Now you have a functioning model of a valve. With the input given in the tutorial, you can already see some interesting things. When reducing the pressure of saturated water from 60 bar to 5 bar, the temperature will drop significantly from ~275 °C to ~152 °C. Also, ~27% of the stream will flash off as vapor.
You can play around with different states.
If you have the Professional version of XLThermo, you can also change the fluid. For example, changing the inlet stream to be saturated liquid butane at 5 bar, and reducing the pressure to 1 bar, will reveal that the temperature drops from ~50 °C to ~-1 °C, with 32% of the stream flashing to vapor.
What you've learned
In this tutorial, you have learned how to build a simple model using XLThermo
Setting the chosen fluid and units system centrally to use across the model.
To model the pressure drop across a valve using a PH flash.
Compute the properties at both inlet and outlet conditions.